In Diversion, an organization is a group of users who share repositories, making it easier to collaborate and manage projects. You can find your organizations underDocumentation Index
Fetch the complete documentation index at: https://docs.diversion.dev/llms.txt
Use this file to discover all available pages before exploring further.
Your organizations in the user menu.
Creating an organization
You can only create one organization per account, but you can be a member of many organizations.Creating your first organization
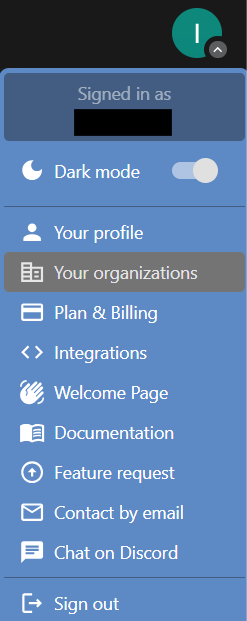
If you don’t own or belong to any organization:-
Click on your avatar in the top navigation and select
Create organization.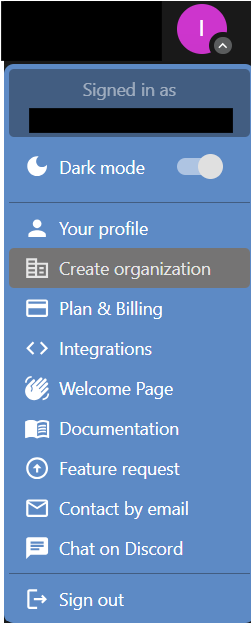
-
Choose a name for your organization and click
Create organization.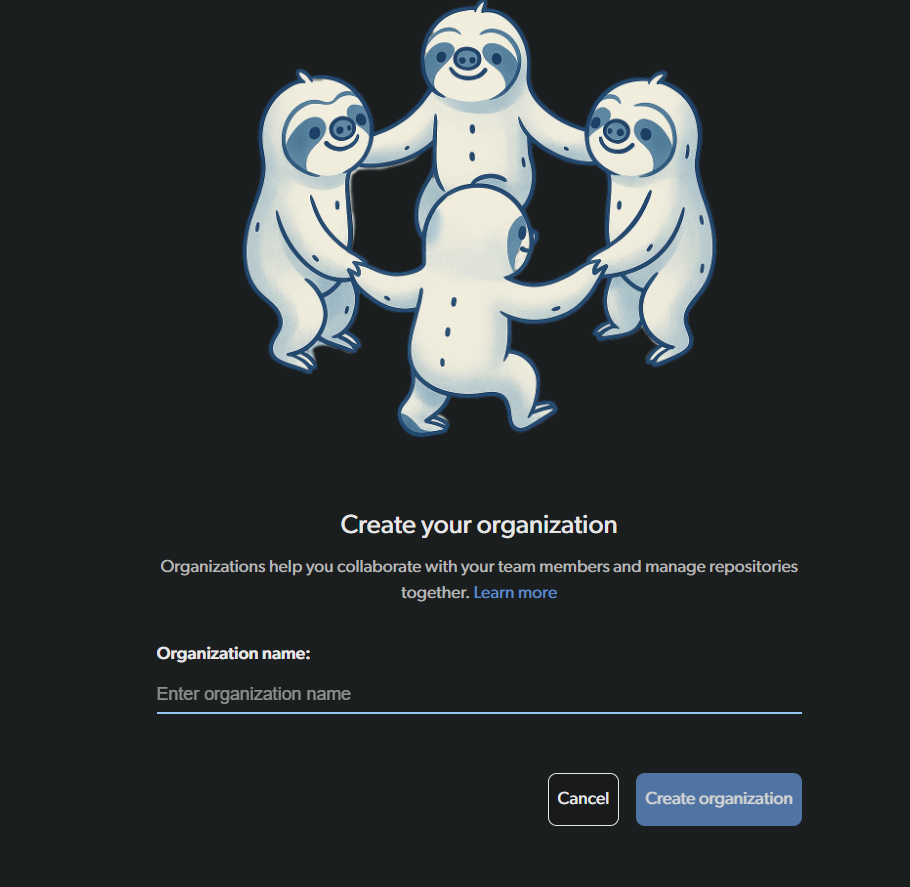
-
Go to
Your organizationspage from your profile: -
Click on the
Select organizationdropdown in the top right corner and select+ Create New Organization.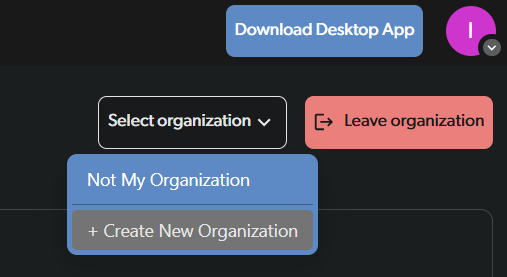
-
Choose a name for your organization and click
Create organization.
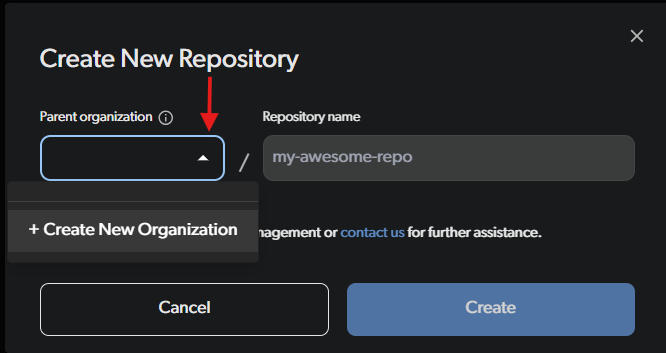
Creating an organization while creating a repository
Alternatively, you can create an organization while creating a new repository:- When creating a new repository, click the
Parent organizationdropdown and select+ Create New Organization. - Enter your organization name to create both the repository and organization simultaneously.
Managing an organization
Each organization has an owner. The owner can invite other users to join the organization. When you add a user to your organization, they won’t have access to all of your repositories and you can still manage access on a per-repo basis. When inviting a user, the owner can decide if the user should have admin privileges. Admins can also manage users, same as the owner. The difference between the owner and an admin is that billing for the organization is managed through the owner’s Diversion account.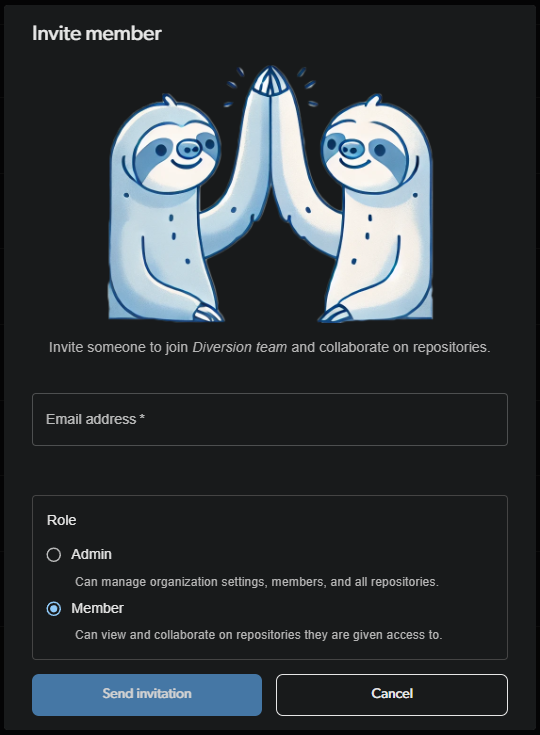
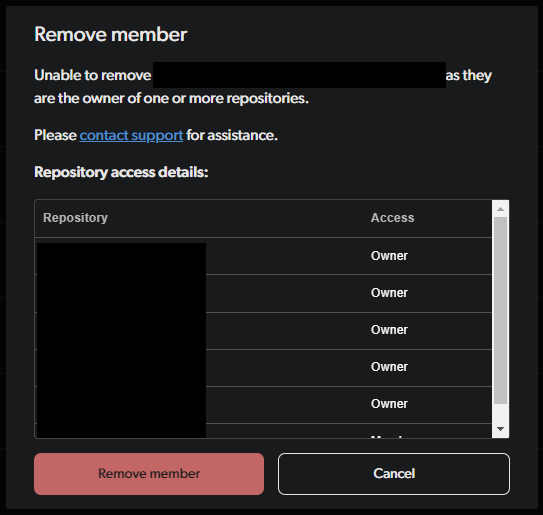
Removing users
The owner or admins can also remove users from the organization. When removing a user, you’ll be prompted with the list of repositories the user can access. These are all of the repositories that the user will no longer have access to. This means that the Diversion agent will no longer sync these repositories with the user’s workspace. This also means that the user will keep stale copies of the repositories that were previously cloned locally.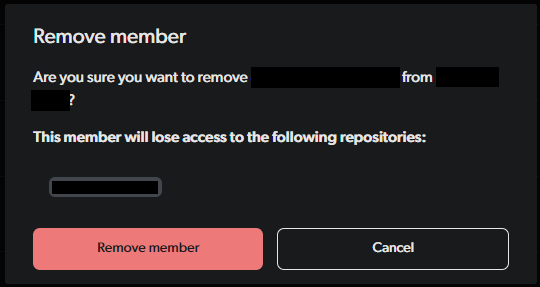
Working in an organization
When you’re a member of an organization and you create a new repository, it will be automatically assigned to your organization. This ensures that all repositories are properly organized and accessible to the relevant team members. Other than that, working as part of an organization is exactly the same as working as an individual user.Organization repository management
Organization owners and admins can view and manage all repositories associated with the organization, including repositories they are not personally collaborating on. This includes managing collaborators and transferring ownership.Viewing organization repositories
Navigate to your organization
Click on your avatar in the top navigation and select
Your organizations.Open the Repositories page
In the left sidebar, click 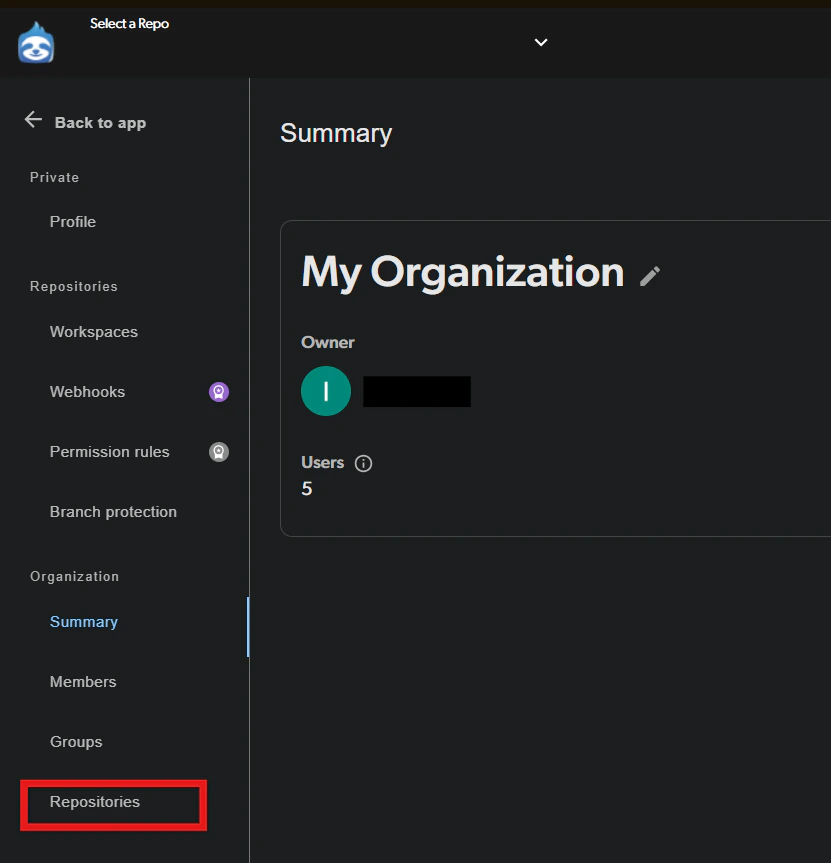
Repositories to view all repositories in the organization.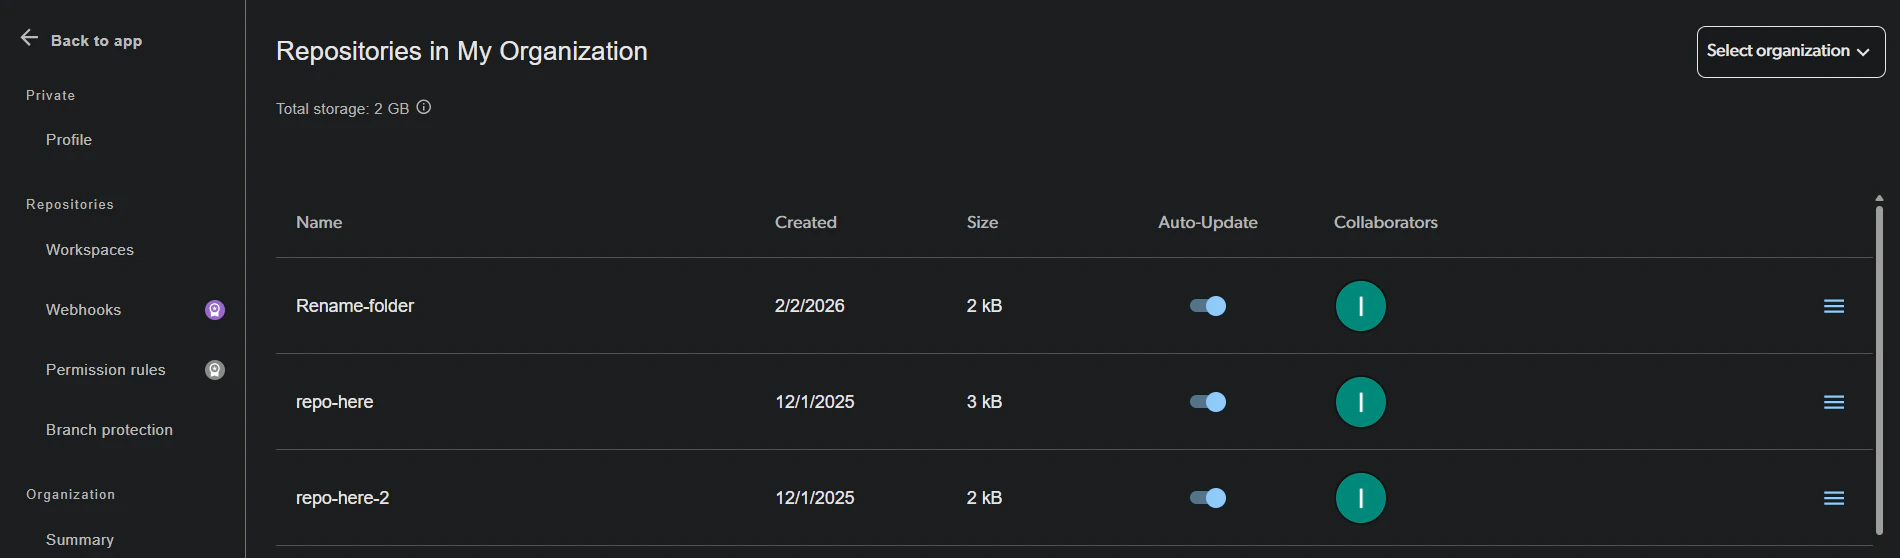
Select organization dropdown in the top right corner to switch between organizations.
Managing repository collaborators
Organization owners and admins can manage collaborators for any repository in the organization, even if they are not a collaborator on that repository themselves.Open the repository actions menu
Find the desired repository in the table and click the menu icon on the right side.

Add or remove collaborators
From the collaborators dialog, you can:
- View all current collaborators and their permission levels
- Invite new collaborators by entering their email address and selecting an access level
- Change a collaborator’s permission level
- Remove a collaborator from the repository
- Add yourself to the repository by entering your own email address — even if you’re not currently a collaborator on that repo
Transferring repository ownership
You can transfer repository ownership to another member of the organization. The user performing the transfer must be both the repository owner and an organization admin or owner.Navigate to the Repositories page
Go to the 
Repositories page in your organization page (accessible from the left sidebar).Open the transfer dialog
Find the desired repository. Click on the menu icon on the right side and select 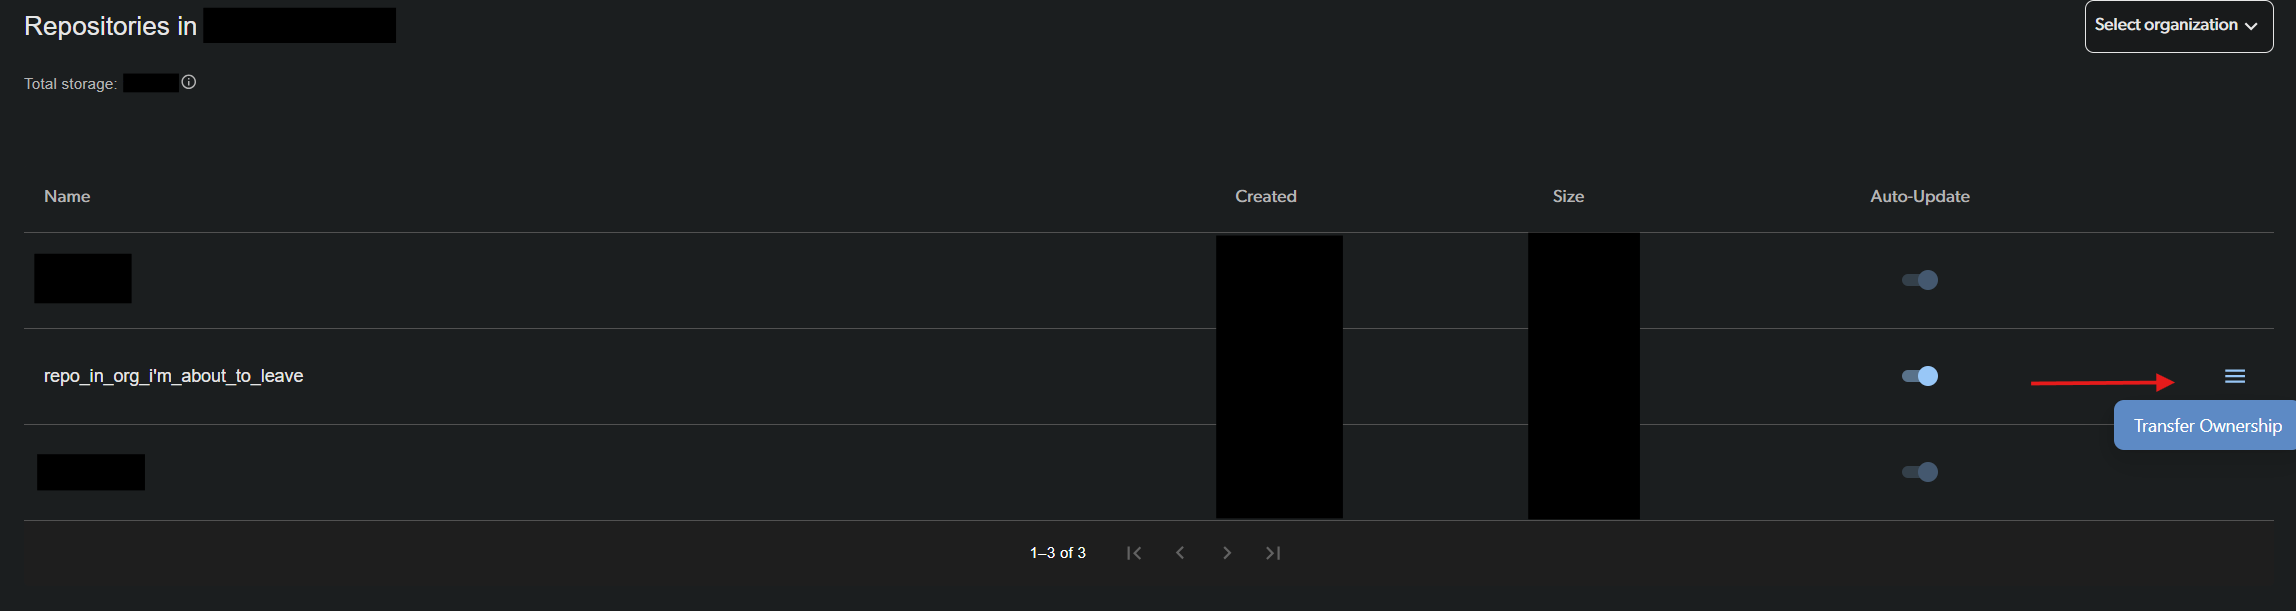
Transfer ownership.Transferring a repository to another organization
You can transfer a repository from your organization to another organization. Only the owner of the source organization can initiate the transfer. The destination organization owner must approve the request before the repository moves. If you are a repository owner but not the source organization’s owner, ask your organization owner to initiate the transfer on your behalf.Open the transfer dialog
Open the source organization’s 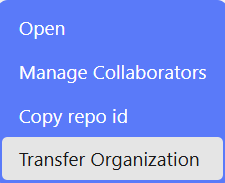
Repositories page. If you belong to multiple organizations, use the Select organization dropdown in the top right corner to switch to the source organization first. Find the desired repository, click the menu icon on the right side, and select Transfer Organization.Enter the destination organization owner's email
Type the email address of the destination organization’s owner and click 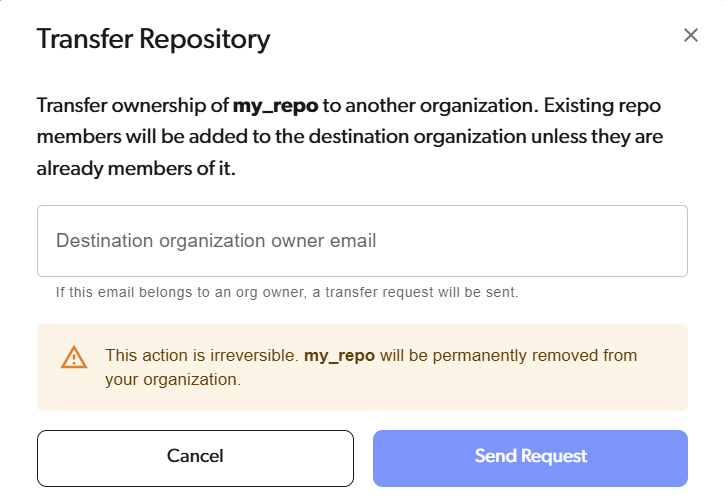
Send Request. A transfer request is sent to that email and appears on the destination owner’s dashboard.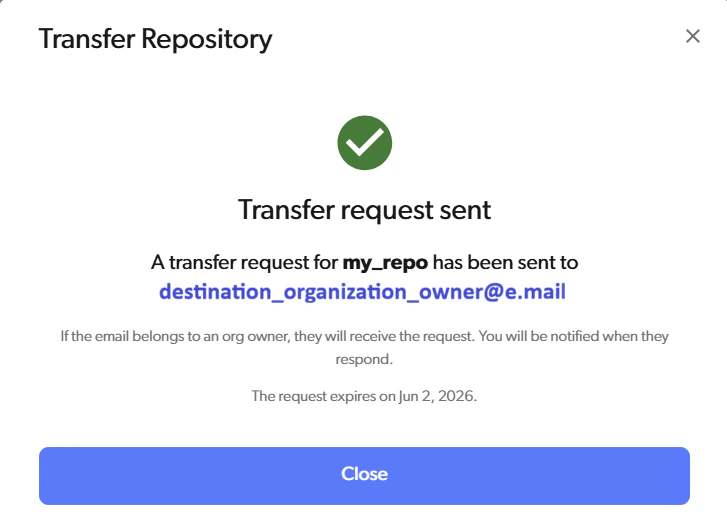
If you need to remove a repository from your organization but there is no destination organization to send it to — for example, the repository’s owner is no longer active and you simply want the repository gone — contact support.
Reviewing an incoming transfer request
If another organization’s owner sends you a transfer request, you will be notified by email and anIncoming repository transfer card will appear on your dashboard.
Open the transfer request from the dashboard
Find the 
Transfer of [repository name] card in the pending invites section of your dashboard and click Review....Review the transfer details
The review dialog shows the source organization, the repository’s storage size, the members that will be added to your organization, and when the request expires.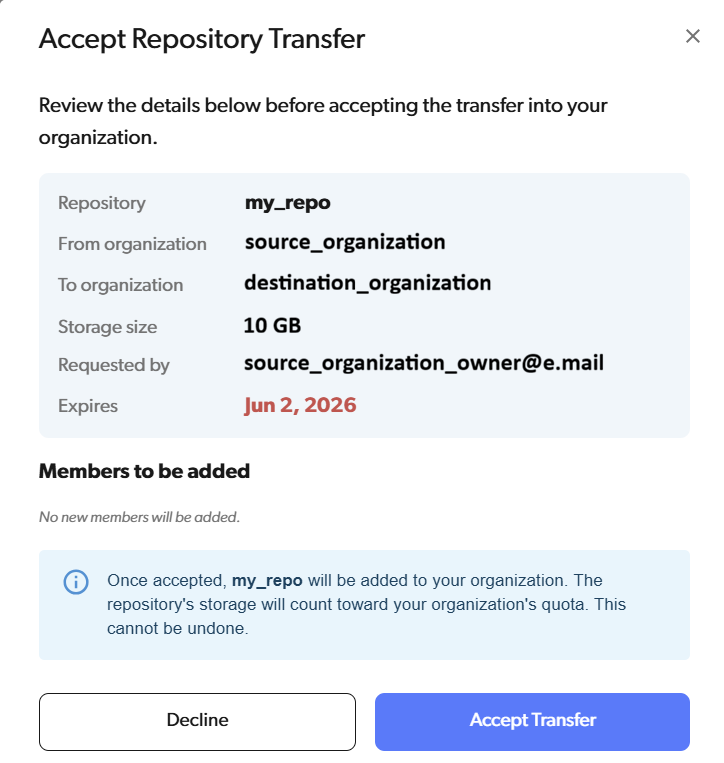
Transfer requests expire after 14 days. Expired requests cannot be accepted — the source organization owner must send a new request.
Leaving an organization
Only non-owner members can leave an organization. Select the organization you wish to leave from the dropdown menu “Select organization” in the top right corner of the screen and click “Leave organization”. Note: Leaving an organization will result in losing access to all repositories associated with it. You can always be invited back to the organization later.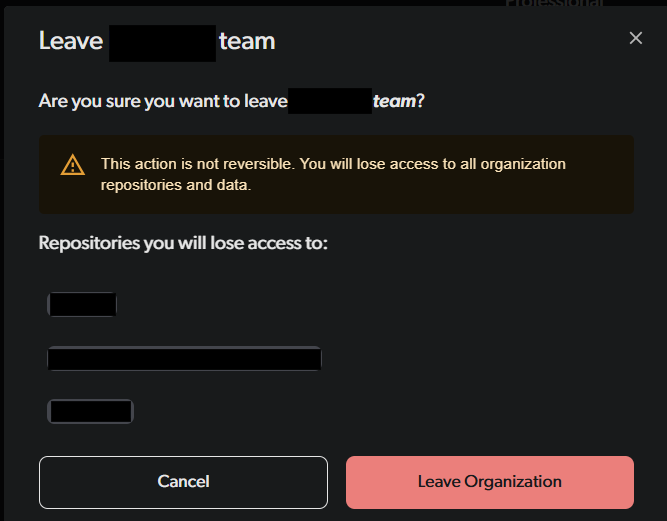
Organization deletion
Deleting an organization is not possible. If you no longer need an organization, you can remove all members and repositories from it.FAQs
What happens to my repositories if I’m a member of multiple organizations?
If you’re a member of multiple organizations, when you create a new repository, it won’t be automatically assigned to any repo. Right now, if you want to assign a repository to an organization, you’ll have to contact support.How do I transfer organization ownership to another user?
Ownership transfer is currently handled by our support team. If you’re an organization owner and want to transfer ownership:- Ensure the new owner is already a member of your organization. If not, invite them first as explained above.
- Email our support team with your request, including the new owner’s email address, and our team will complete the transfer.
- The new owner should select their desired tier, storage capacity, and seats, then add a payment method to avoid subscription breach system messages.
- Once the new owner has set up their subscription, cancel your old subscription from Plan & Billing to avoid double payment.
How do I become the owner of an organization I am a member of?
Ask your organization owner to contact our support team and request the ownership transfer to your account. The owner should follow the steps outlined in the question above.Why am I receiving system messages about exceeding my user limit?
If you’re seeing system messages like this:
- Upgrade your plan - Purchase additional user seats to accommodate your current team size.
- Remove users from your organization - See the removing users section above for step-by-step instructions.
